The Starfall Dress ✨
- TrishYoung

- Jul 23, 2025
- 7 min read
As the first installment of my posts documenting various projects, I would love to start with my most recent and current favorite: what I call my Starfall Dress. Made with the Simplicity/Raine Emery pattern S3094, I chose colors and accessories reminiscent of an evening under the stars. It survived two trips to the Oregon Renaissance Faire, underwent a few modifications, and made me feel like a true princess. Here's some of the behind-the-scenes of making it!
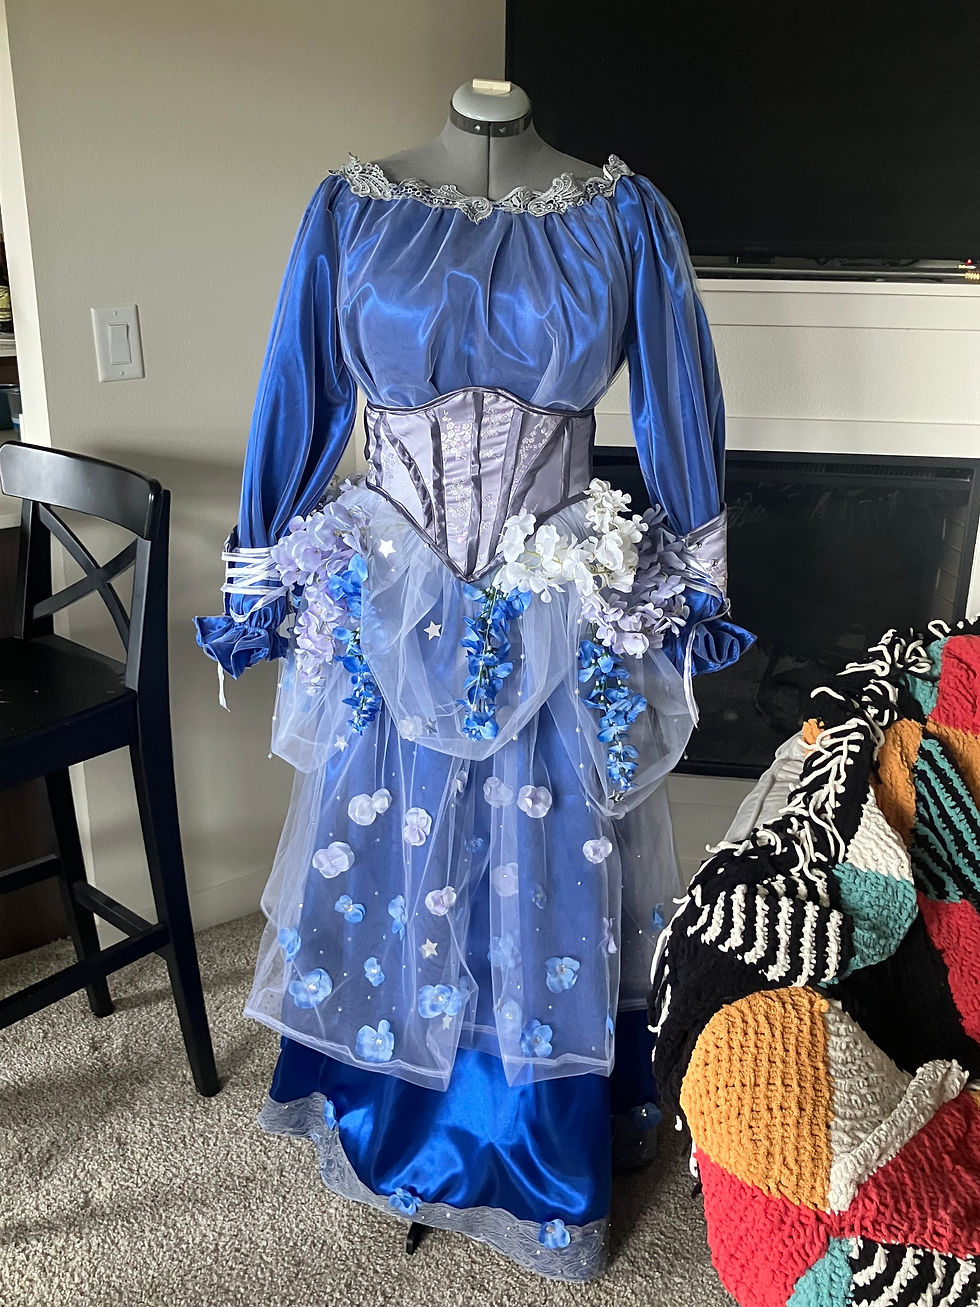
As always, the process began with choosing fabric. And with JoAnn stores closing nationwide, I was left browsing online and hoping for the best. I did end up getting pretty lucky with my choices, although the original tulle overdress fabric wasn't quite what I wanted and I ended up getting more from Michael's. With the classic evening blue, the lavender of a dusky western sky, and the silver of glittering stars, I felt that I had covered my bases in terms of color.
Once I finally got up the courage to start cutting my beautiful fabric, I found that my motivation - usually here and gone in a moments' notice - stayed high and I made steady progress. I began with the overdress because I knew it would require the longest "prep" period, what with adding the flowers and gems to the bottom layer. And sure enough, she stayed on the mannequin for a couple weeks as I slowly glued and sewed on individual rhinestones and flowers.
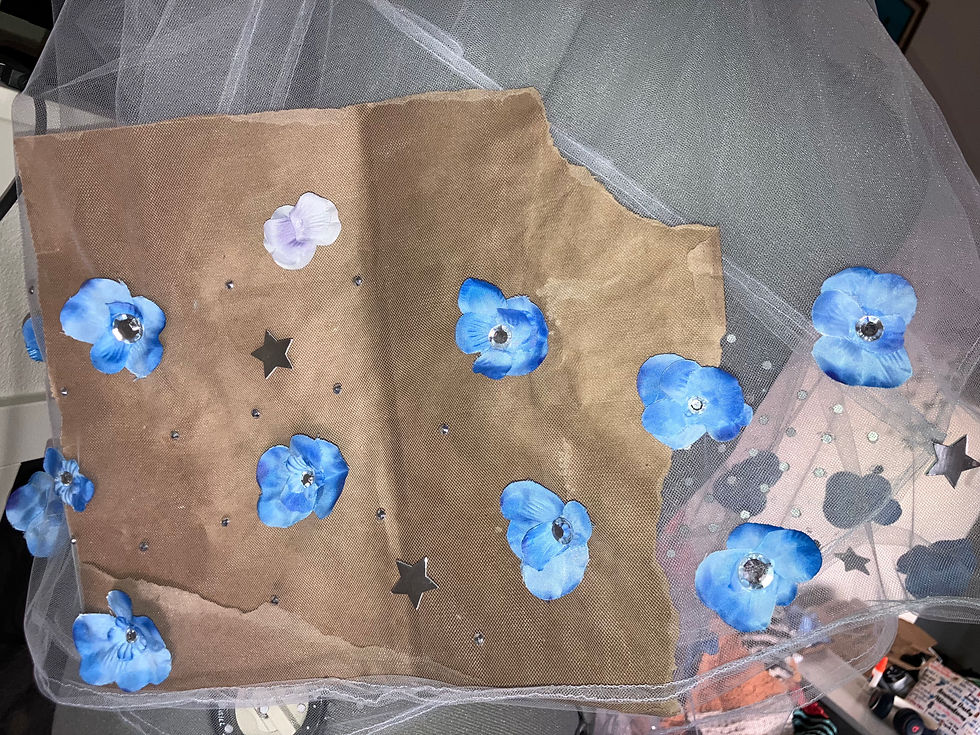

I had big plans initially to use only rhinestones to make it a sparkly, glittering skirt, but a couple hundred gems in, I changed my mind and started adding the flowers and stars. Turned out that was a good decision, because it left me with enough remaining gems (and sanity) to decorate the bottom hem.
In classic form, I chose to work on the easier parts next, which in this case were the armbands. They were very simple, with a lining and bias tape piping around the edges, and once the grommets were in they were done. They then sat on my project pile for a few weeks, waiting for me to finish the rest of the outfit so they could join the party.
Next up was the corset. And boy howdy, that was a process. Not only was it fully lined and supported with boning, it had a complex process for sewing the channels for the boning and included DIY bias-tape piping on the front.
Although the pattern calls for spiral steel boning, I couldn't find it anywhere, so I went with the featherlight nylon boning that I already had on hand. The process for adding the boning was something I had never done before: instead of sewing two fabric pieces together and then stitching channels through both, the pattern calls for using a heavier weight fabric as the inner lining and stitching the corset pieces (all ten of them) with an extra large seam allowance, then pressing the seams open and stitching down those to make the channels.
It only took me four tries to get it right.
And yes, that meant four times stitching it all together incorrectly and then seam ripping, often after a cooldown period, then going back to lay it out on my sewing table and try again.

But eventually, I got it! Phew... only another two layers to go. But at least the boning was in and I didn't have to deal with it anymore.
Next up was adding the piping to the top layer. With my created bias tape, I layered and stitched pieces so that once I completed and pressed each seam, the gunmetal-gray piping would sit nicely on top of the floral lavender corset front.
With the piping done, I stitched the lining and top layers of the corset together, sandwiched the inner lining between them, and sewed all three together. To finish the edges I used the last of my created bias tape and stitched that around the outside of the whole thing.

Now, at this stage, the pattern calls for adding the grommets and finishing everything up. But when I held it up to my body, the ends only reached my sides, rather than close to my middle back. My solution for this was to add another panel to each end so that they would extend further around me. That solved that problem, so I moved on to hammering in the grommets, which helped relieve some of the frustration of having to remake it so many times. 🤣
At this point I decided to move on to the main dress and get that finished up before adding the flowers and swag to the corset.
The body of the dress is a lot larger laid flat than it appears when the whole thing is put together. It also looks a little silly without the corset, but I wanted to document the process and be able to take a step back for perspective. Working with the sleeves was a little tough simply due to the volume of the ruffles. It was nearly arm-length when I started, and once the elastic was sewn in, it condensed down to my wrist circumference - which is a huge change. It definitely created an extravagant, princessy sleeve look, though.
The density of flowers and rhinestones on the overdress was exactly where I wanted it, and after stitching that together with the underdress, I started getting excited about the final product.


For the lace trim, I played with a few different options. Oddly enough, my final choice involved silver spray paint (don't tell my sewing technician, but there's some paint remnants in my sewing machine from stitching this!). I had found some pretty lace trim that would work beautifully on the dress, but it was an ivory color, and I wasn't thrilled with how it looked with the rest of the dress. On a whim I took it out to the balcony, laid it in a cardboard box to prevent over-spraying, and coated the whole length of it in silver. After it dried, I decided that yes, this was it! I did the same thing with another length of wider trim, and stitched it all into place along the top and bottom hems.
Next up, the corset re-entered the scene for its floral upgrade. The swag is made from the same tulle as the overdress, and the pattern pretty much allows free rein over the decoration. So, I pinned and arranged flowers, pearls, and stars until I felt pleased with the overall look. Then it was only a matter of stitching down every strand so it laid nicely, but didn't threaten to fall off. No biggie...

If you know me personally and have followed any of my other projects, you may have noticed a trend by now in my working method. Big plans, trepidation about starting, reworking pieces into their places, excitement for the final product, and the final sprint to the finish line. This project was no different.
Finally, finally, it was time to try it all on together. Now, before you see the final product, I should mention that I did make some modifications to the original pattern. There are supposed to be a total of four armbands, one on each upper and lower arm, but when I tried them on with the dress it felt like too many shapes all jostling for attention. Without the upper armbands, I felt happier with how it all looked, so I pulled them off and did my best to tie the corset and forearm bands on my own.
With a final few rhinestones and flowers tacked to the bottom trim, she was ready to go. And here's the shocking part - I still had a few weeks before I planned to wear it! So, to fill the time and complete the look, I used some thick wire and made my own princess tiara to wear with the dress.
And eventually, the time came to bring it to the Renaissance Faire. As anyone who attends these events knows, getting ready in the parking lot is kind of a necessity for many of us. Including me. There was no way this dress was going to work with a seatbelt, so into the passenger seat she went, and I drove up to Canby with my glittery makeup and everyday clothes on. Although getting the dress on and settled nicely by myself was tough, I managed it, with some help tying the corset and armbands from some lovely ladies passing by.
What princess look is complete without her knight in shining (hand-made) armor? My boyfriend Bryson arrived a bit after I did, and we met up inside the faire. He had made his own pieces of plate armor out of sheet metal, and there was no way you could tell that this was his first ren faire:

And there you have it: the Starfall Dress, start to finish. I was absolutely thrilled with how it came together, and I got SO many compliments on it at the faire! Definitely a five star rating from me.
What do you think? Would you try making your own version of this dress? (Highly recommend it, by the way!)
Let's see where my next project takes me - or maybe I'll take a look back at other projects to share!
Thanks for reading!
-T


Comments